Afterthought Thrums

A couple of years back I was asked to teach a class on thrummed mittens. Naturally, I experimented with heaps of patterns in my quest to concoct the perfect mitten– but ultimately found that the most important thing is the construction of the thrum. I thought I’d share my recipe for the perfect thrum, plus a neat trick to replace missing thrums in your finished object.

How I make my thrums

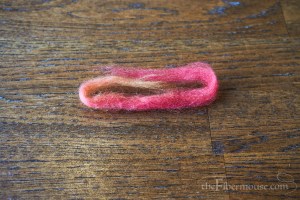
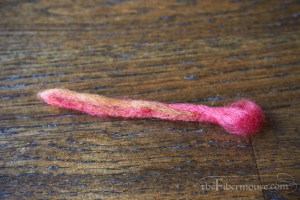
My method is based on the Yarn Harlot’s technique, but there’s one important difference: instead of twisting in step 3, I use two fingers to roll the center of the thrum against the palm of one hand until it’s lightly felted.

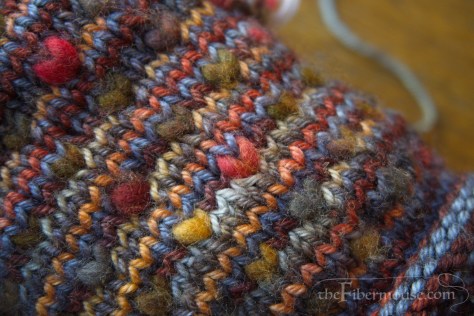
This creates a much more durable thrum than the twisted technique, and keeps the inside of the mitten from getting scraggly with wear. The poor half-mitten pictured below has been much abused as a teaching model, but the thrums are still as soft and puffy as when I made them. (Once washed and worn, they’ll felt and stick to one another a bit more.)
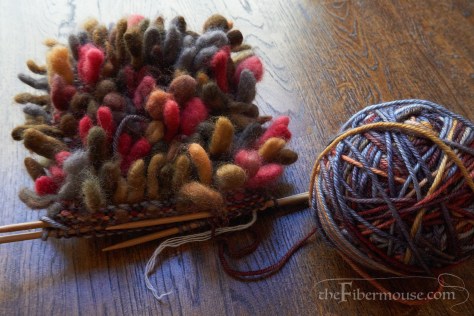
Your thrums should be a little bit thicker than the yarn you’re knitting with, but not so much that they distort the shape of the stitches. Once you knit them into the mitten, they’ll compress down to about the same size as the yarn and look like neat little hearts.

Inserting a thrum after the fact (i.e., “afterthought thrumming”)

Because the Perfect Thrum is neatly felted, you can treat it as if it were a short piece of yarn, and insert it into your knitting even after the mitten is complete. Reasons you might want to do this:

  • You accidentally left out a thrum while knitting.
  • You accidentally pulled out a thrum while knitting.
  • One of your thrums was mangled in a tragic accident, and you yanked it out in pity.

To fill in the empty spot on your mitten, you’ll need a crochet hook in a size suitable for your yarn (or slightly bigger) and a spare thrum.

  1. Find the stitch where the missing thrum belongs, then insert the crochet hook under both legs of the stitch immediately above that one.
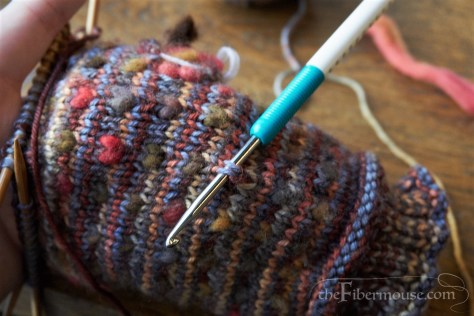
  2. Catch one end of the thrum and pull it through.
  3. Put the crochet hook inside the mitten and bring up the hook at the base of the stitch you’re thrumming.
  4. Catch one leg of the thrum and pull it down inside the mitten.
  5. Repeat with the other leg.
  6. Smooth the fabric around the thrum with your fingers.7. Admire your handiwork!

More thrumming tips

dsc00780

  • To take your thrum knitting out on the road, prepare a batch of thrums in advance and carry them in a small organza gift bag– the fabric is stiff enough to protect your thrums from squashing, and keeps any fuzzy bits from escaping.
  • Whether you’re working from a kit or following a pattern, you probably have a bit of commercially prepared top or roving with which to make your thrums. Don’t cut your fiber– just grab a pinch from one end and pull! If the fiber won’t come apart, make sure the roving isn’t twisted and move your hands farther apart. You can also strip it down lengthwise to help keep the width of your thrums consistent.
  • You can insert afterthought thrums with a very short tapestry needle using duplicate stitch, but I find this rather more fiddly than the crochet hook method.

Save

Save

The Tapestry Post

Last year, my local reenactment group won its bid to host a high-level competition in Arts and Sciences, which encourages research and experimentation in almost any sphere of medieval technology. As it happened, I’d been looking for a long-term project to sink my teeth into– an ambitious project to improve my skills. (Rather than, say, a sweater to dawdle over for a year or two. Several of those are already hibernating cozily in the nooks and crannies of my apartment.)
So, I knew right away that I wanted to enter something. But what? I could make early Renaissance lace-trimmed goodies. I could build miniature models of historical looms. I could print woodcut maps…. I was at this stage of deliberation when, as I idly browsed museum websites, it struck me.

I could weave a tapestry

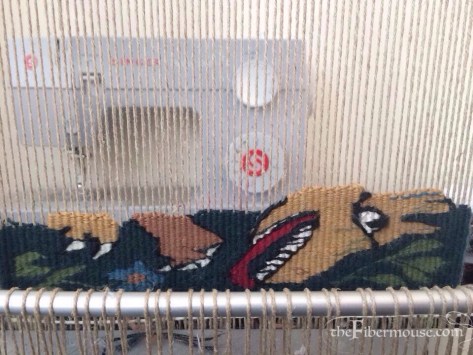
I’d done a few samples back in 2011 and 2012, but not much, so there was some prep work to do. To put together a compelling entry (and for my own senses of academic propriety), I had to research the history and development of tapestry weaving in Europe and worldwide, I had to determine the appropriate techniques and materials, and I had to… learn to weave tapestry. With six months to go, I set to work.

Now, I knew that I didn’t want to design my own picture from scratch. The tapestry medium has some unique properties that I thought would be difficult for a novice weaver to predict. I also knew that I wanted to do something small in scale.


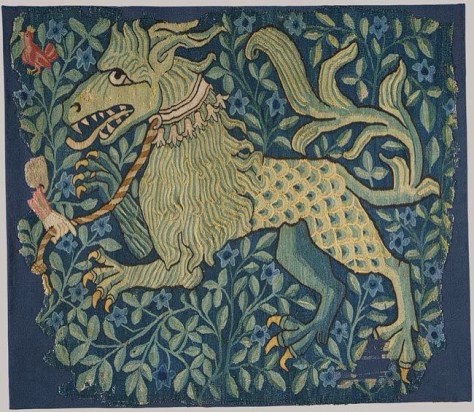
Source: http://www.metmuseum.org/toah/works-of-art/1990.211

This delightful creature lives in the Met. He’s about three feet square, a fragment of a larger hanging. According to the experts, the collar symbolizes restrained lust or the taming of nature or something along those lines— however, I just found him endearing.

When adapting the design of the Fabulous Beast to a smaller format, I scaled certain elements up and down and reduced the overall level of detail. Here are some of my cartoon sketches:

  
I planned  to weave my beast in the opposite direction from the original tapestry. This, I thought, would make it easier to compare my weaving to the original as I wove from the back of the tapestry. (As it turned out, I would have been fine either way, but that’s mostly thanks to the new loom I purchased partway through the project. Photoshop felt like cheating, and also I didn’t think of it.)

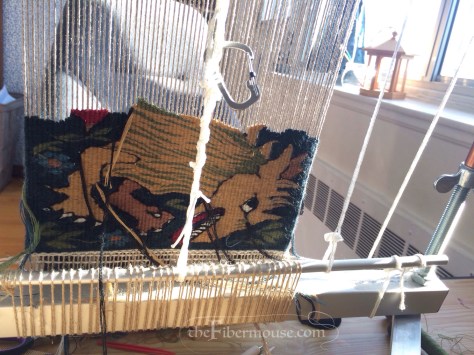
I also wove the image sideways. Vertical elements (like trees and legs) are much more smoothly woven at a 90-degree angle to the warp, and if you look at the warp ribs in the original tapestry, you can see that it too was woven sideways. 

So, that was enough to start with. On to the materials!

Here’s what I planned to use:

  • Handspun 8/3 linen warp
  • Handspun, naturally dyed Wensleydale weft
  • My Good Wood Slant loom, propped up vertically, with an 8-dent rigid heddle as a raddle and string heddles for shedding

Here’s what I actually used:

  • Webs 8/4 linen rug warp
  • Habu 48/2 merino, 6 strands together, for weft
  • A new and shiny Mirrix Zach loom with treadle

 I set up a sample with the Webs rug warp and had at it. As the sample progressed, I was actually quite pleased with the results I was getting, so I continued on with it… right until my poor cherrywood loom, which really wasn’t designed for this, started torquing under the tension. 

  
Oops! (Who could have seen that coming, right?) 

I scratched my head over an assortment of frame looms, priced out the cost of building a copper loom, scoured Craigslist ads for used tapestry looms– suffice to say that after a complicated series of events, I obtained a Mirrix at the end of December. Hooray

But by then there was no time to spin the Wensleydale, and no budget left to order the dyes I wanted. I was able to spin a reasonable rug warp out of the flax sliver I had on hand, but thought my time would be better spent… well… I was impatient to get that beautiful loom warped. 

I was up and weaving again on January 1st.


The deadline was in early March.


 Weave, weave, weave.


I made it to the end by the skin of my teeth. The thing was off the loom less than twelve hours before the competition, and tacked to a canvas mount less than twelve minutes before the competition. (The other elements of my entry have been previously featured on this blog, aside from a small book’s worth of documentation and references. Unfortunately, I forgot to photograph the display.) 

  
No, I didn’t win, but I placed in the finals and got a face-to-face judging– very good for a first attempt, I think! As the current champion of my local group, I was anxious to make a good showing, and I hope I did them proud.

  
And now my closet has its own fierce little guardian.

A Bobbin Box

So I’m a bit of a scrap hoarder. I have a bin for wood scraps, a bin for leather scraps, a bin for wire scraps, et cetera. This drives my boyfriend crazy. But as you crafters know, all that stuff comes in handy one day. And it’s so rewarding to find just the right thing without having to run to the store and spend your entire craft budget on some silly little part.

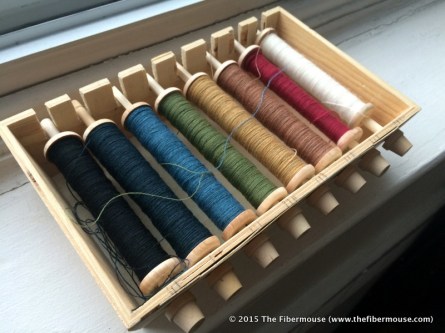
Right now, I am working on a tapestry. (That’s a post for another day.) I tried various methods of wrangling the pile of mini-cones on which the fine wool weft was wound, none of which were working quite right. Then a lightbulb went off!

I got out the scrap bins.

img_7351

A bit of doweling, a plywood tray, and eight might miniature flowerpots later, I am totally organized slightly less disorganized.

Festivities

Honestly, I tried to cut back on handmade gifts this year.

Of course, that turned out to be boring. So when, in mid-December, my grandmother told me that she was hosting a family gift exchange…

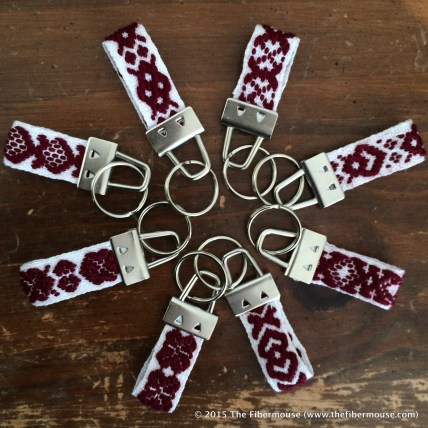
Handwoven Baltic-style inkle keychainsI made these. Hooray! It’s not Christmas without a last-minute project.


Last year, I… well, I started a small fire that happened to melt my mother’s old advent wreath. So I took some wool scraps from the Dorr Mill store and appliquéd her a new one:

Hopefully, this wreath is less flammable.


We also had a solstice party. I made a Yule log.

IMG_7291-001

The log appeared to be in an advanced state of decay, but taste tests were favorable. The meringue mushrooms received especially good reviews.


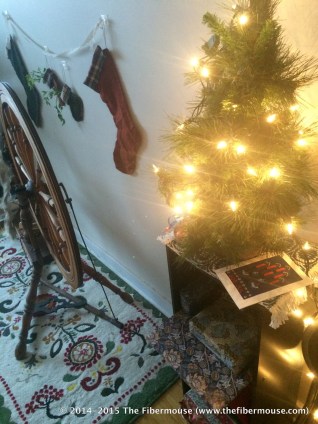
From my trusty bin of wool scraps, I whipped up some stockings for us and the pigs and tacked them to the wall:

1-IMG_7106It was a pretty sloppy effort, but the rodents in question were very excited to find parsley in their socks.


And last but not least, look what my significant other surprised me with: an antique reel!

1-IMG_7122From what we can tell, it probably dates to the late eighteenth or early nineteenth century, and was probably made in Quebec. Any opinions on the subject would be appreciated. Aside from two nails in what is an obvious repair job), the joinery is entirely wood pegs and mortise-and-tenon joints. The wood looks like pine.

Whatever its provenance, it’s in beautiful shape and makes a tidy skein. The reel now lives in our living room where I can admire it from my knitting chair.


I hope you all had a pleasant holiday, if you celebrate any, and that you have a happy 2015!


A Tablet Weaving Hammock

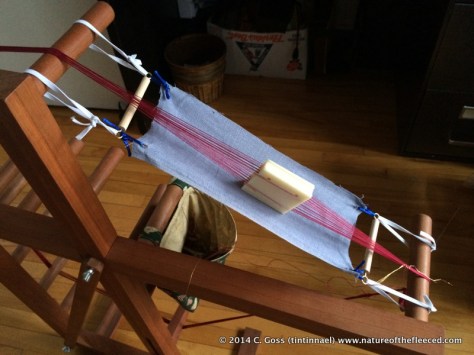
Some weave structures and yarns are difficult to manage on a fixed-tension tablet or inkle loom. The tablets like to sneak out of position while you’re weaving, and if you prefer to take the tension off the loom between weaving sessions (as I do), the weight of the cards can damage the threads.

To keep everything orderly, many tablet weavers clamp their weaving to a board (for example, the one pictured here). This isn’t a particularly comfortable way for me to work. Luckily, I had an epiphany:

IMG_4212

This is my prototype weaving sling/hammock/thing. The dowels hold the fabric to its full width, and the elastic tying the dowels to the loom keeps the fabric at just the right tension to hold the cards steady when not in use.

So far, I’m very pleased with the results, but there are sure to be refinements in the future!

Historicity

Not everything I’m working on at the moment is clothing, or modern.

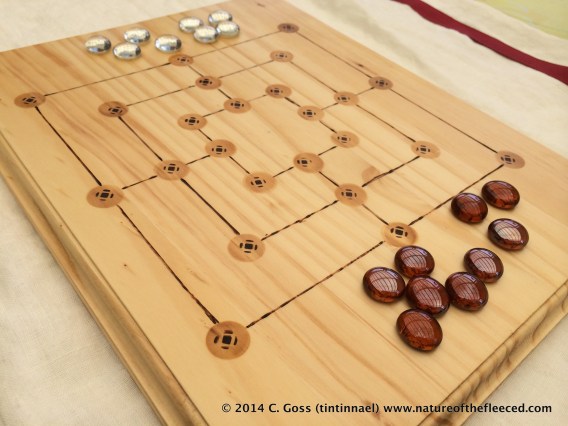
Case in point, a Nine Men’s Morris board that I made for my partner’s birthday:1-IMG_4138

And a tiny geteld (an Anglo-Saxon tent):

1-IMG_3997
I would like a full-sized one, too.

Some heraldic experiments for SCA purposes:
3-IMG_4035

4-IMG_4054

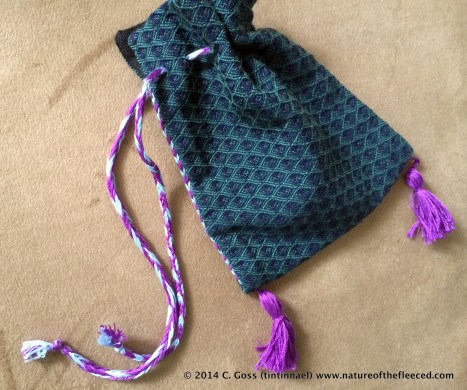
And a recently finished little pouch. This was a kit from a class I took in February, but mumble mumble busy. Actually, much of what I’ve been busy with has also been SCA-related. I went to a camping event in May where I picked up a few goodies and took exactly one photo of the site.

At the moment, I am reparing gores and finishing seams in anticipation of my very first PENNSIC (!). Once the existing stuff is up to scratch, I want to make an early Kentish or Merovingian ensemble along these lines.

As always, more ideas than time!

The Good, the Meh, and the Tardy

The Good

I finished enough of my 16th-century Flanders outfit to wear at the demo this past weekend. Here’s how it came out:

There are a few bits and pieces that I still would like to finish, but at least I had the partlet done! It was essential for sun protection, since my group sadly lost its tent due to high winds. (This is also why my hat is so obviously tied on.) Mugs and weapons racks and people were all blowing over, so my poor lace pillow didn’t stand a chance– I wound a few bobbins but didn’t actually make anything.

The Meh

I’m still working on Hazel. The light blue is the “hopefully wearable test garment”, and the rose linen is the “real thing”:


(If I don’t finish the straps in time, I could always wear my partlet. Ha!)

Making good progress with the Aynia shrug, but I’ll have to hurry up want it for this weekend.

1-IMG_3092

The Tardy

Crepe:


1-IMG_3074


‘Nuff said.

A bit more on that shawl bag

I recently wove and sewed a bag to coordinate with an old handwoven prayer shawl, and had lots of fun coming up with overshot treadlings on the fly. The recipient asked for the bag to echo the design of the (intimidatingly masterful) original shawl, with the addition of an embroidered Star of David. Have a peek:

This was a fun project, and I’m happy with how it turned out. Next time, I’ll put on a longer warp!

Notes on weaving, historical costuming, and other eccentric pursuits.